
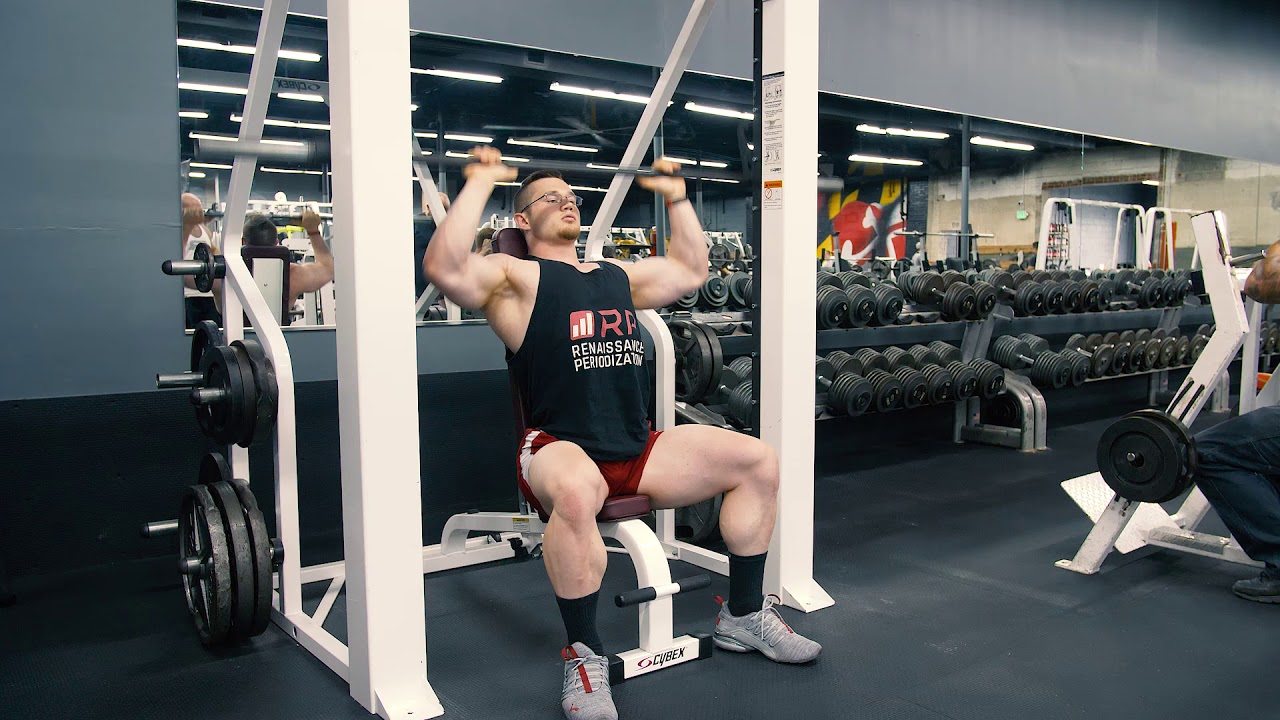
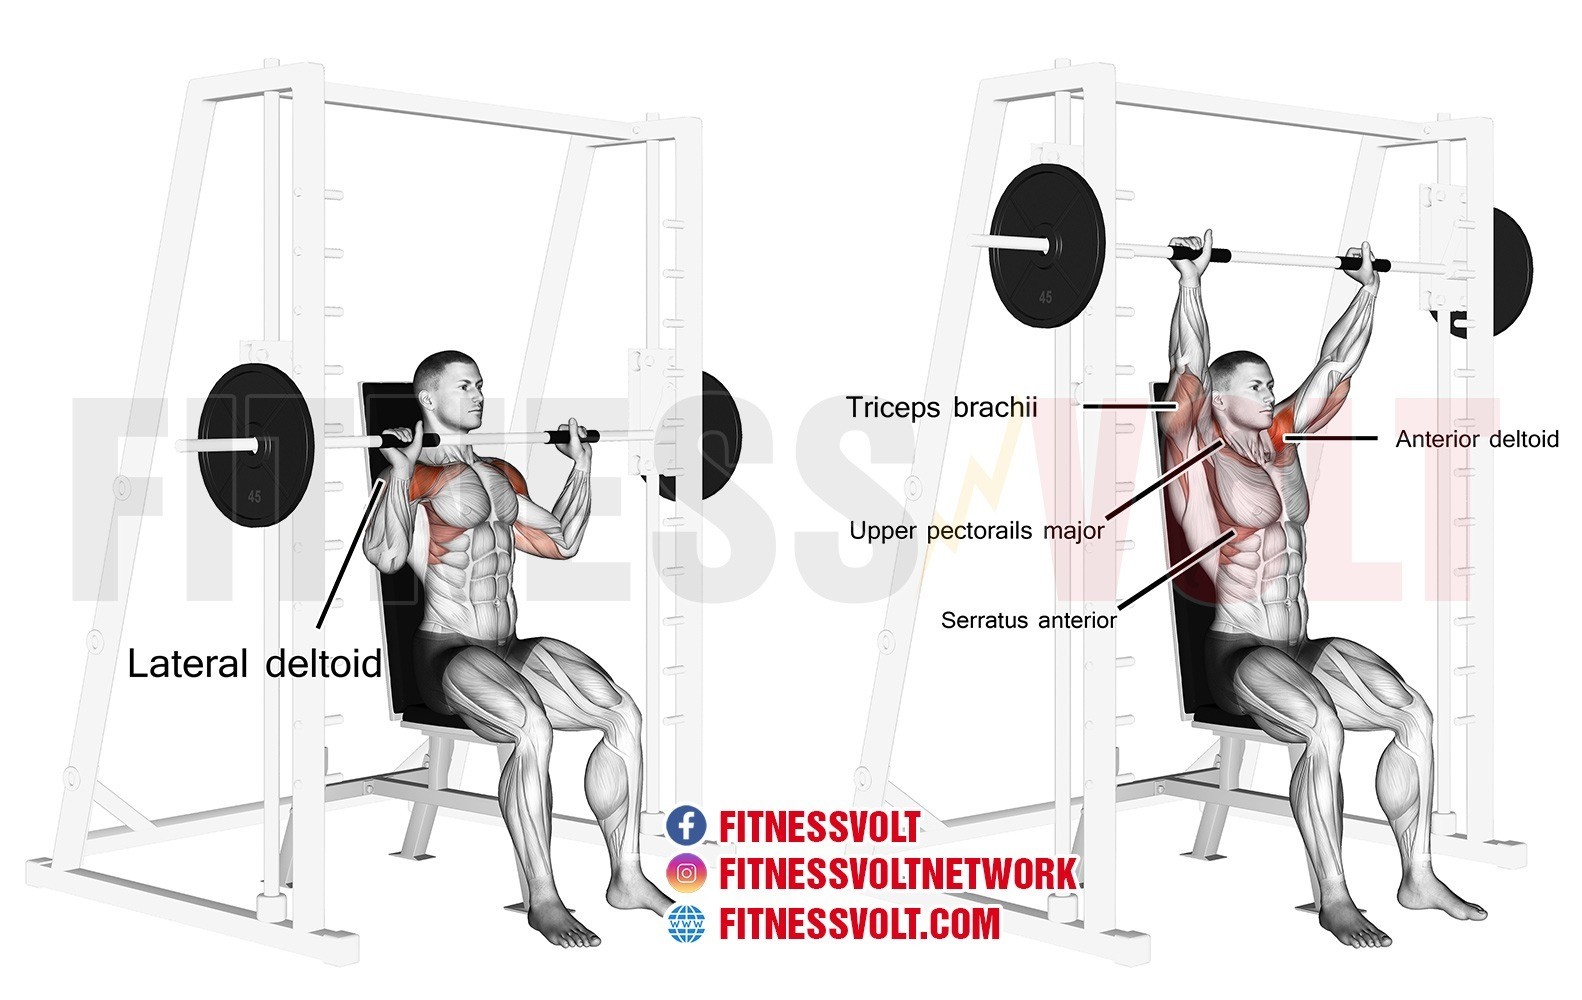
When it comes to building upper body strength, the seated Smith machine press is an exercise that can't be missed. This exercise targets the shoulders, chest, and triceps, making it a great addition to any workout routine. In this article, we'll take a closer look at the seated Smith machine press and how to perform it correctly.
What is the Seated Smith Machine Press?

The seated Smith machine press is a variation of the traditional bench press that uses a Smith machine. The Smith machine is a weight training machine that consists of a barbell that is fixed within steel rails. This barbell moves up and down in a fixed path, which provides added stability and safety during the exercise.
How to Perform the Seated Smith Machine Press
To perform the seated Smith machine press, follow these steps:
- Adjust the seat height so that the barbell is at shoulder level when you're seated.
- Sit on the bench and place your feet flat on the floor.
- Grasp the barbell with an overhand grip, with your hands slightly wider than shoulder-width apart.
- Lift the barbell off the rack and hold it above your chest.
- Lower the barbell towards your chest, keeping your elbows close to your body.
- Pause briefly when the barbell touches your chest.
- Push the barbell back up to the starting position, keeping your elbows locked.
- Repeat for the desired number of repetitions.
Tips for Performing the Seated Smith Machine Press

Here are some tips to help you perform the seated Smith machine press correctly:
- Keep your back flat against the bench throughout the exercise.
- Breathe in as you lower the barbell towards your chest, and breathe out as you push it back up.
- Keep your elbows close to your body throughout the exercise.
- Use a weight that allows you to perform the exercise with proper form.
- Don't lock your elbows at the top of the movement.
- Don't let the barbell rest on your chest at the bottom of the movement.
Variations of the Seated Smith Machine Press

There are several variations of the seated Smith machine press that you can try to target different muscles:
- Close-grip seated Smith machine press: This variation involves holding the barbell with a close grip, which targets the triceps more than the chest and shoulders.
- Incline seated Smith machine press: This variation involves adjusting the bench to an incline position, which targets the upper chest muscles more than the shoulders and triceps.
- Decline seated Smith machine press: This variation involves adjusting the bench to a decline position, which targets the lower chest muscles more than the shoulders and triceps.
Benefits of the Seated Smith Machine Press
The seated Smith machine press offers several benefits, including:
- Increased upper body strength and muscle mass
- Improved shoulder stability and mobility
- Reduced risk of injury compared to traditional bench press
- Ability to target specific muscle groups with variations
Conclusion
The seated Smith machine press is a great exercise for building upper body strength and muscle mass. By following the correct form and incorporating variations into your routine, you can target specific muscle groups and achieve your fitness goals. Remember to start with a weight that allows you to perform the exercise with proper form, and gradually increase the weight as you get stronger.
Related video of Seated Smith Machine Press: A Comprehensive Guide

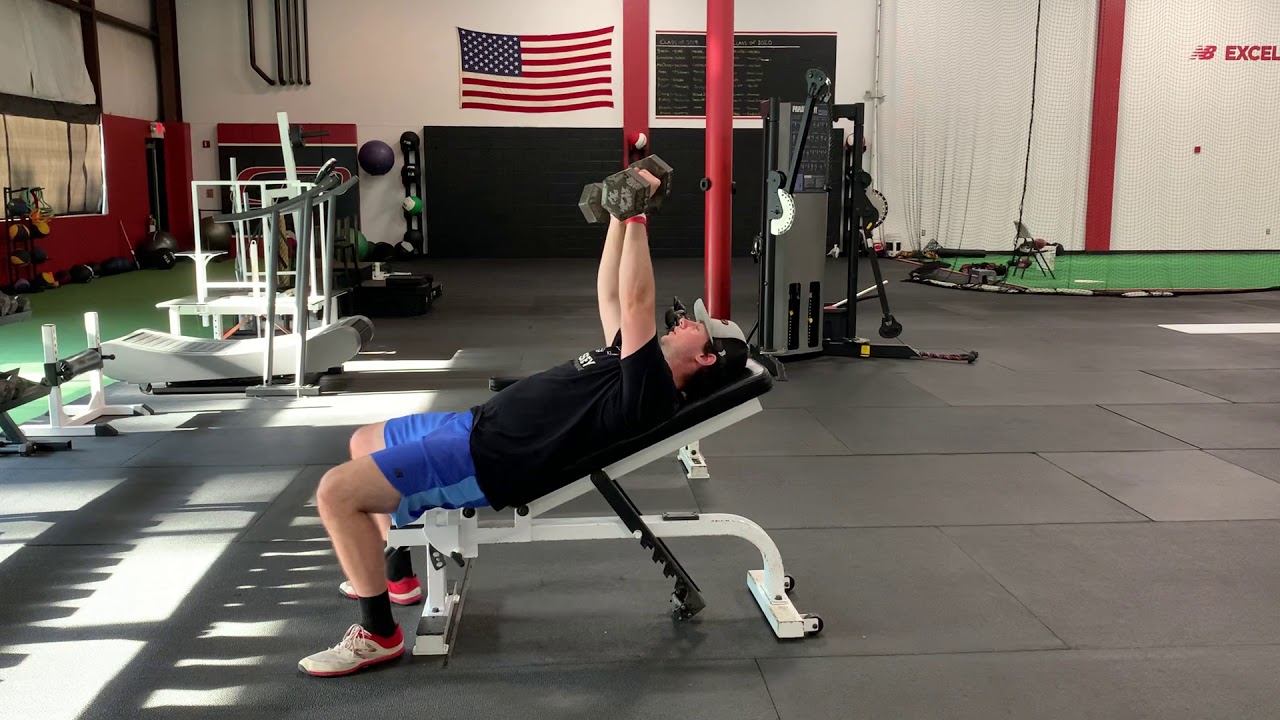
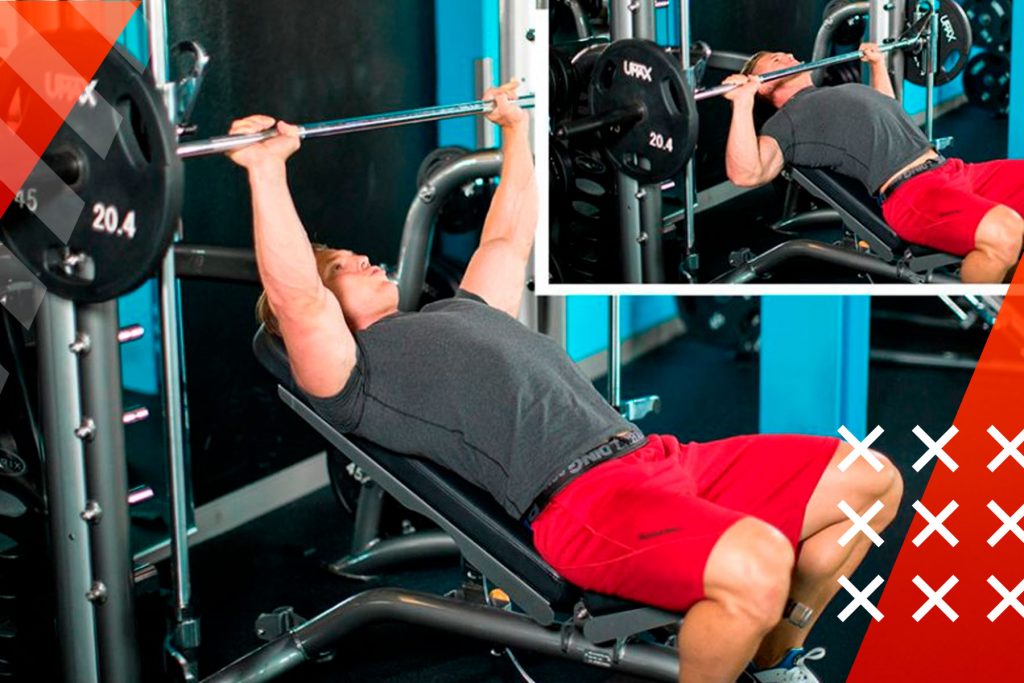
The alternating incline bench press is a popular exercise that targets the chest, shoulders, and triceps. This exercise involves lifting two dumbbells alternately while lying on an incline bench. It provides a challenging workout for the upper body and is a great way to build strength and muscle.
Benefits of Alternating Incline Bench Press

The alternating incline bench press has several benefits, including:
- Building upper body strength: The exercise targets the chest, shoulders, and triceps, helping to build strength in these areas.
- Improving muscle imbalance: By lifting the dumbbells alternately, the exercise helps to improve muscle imbalance in the chest and shoulders.
- Engaging stabilizer muscles: The incline bench press engages the stabilizer muscles in the shoulders, helping to improve overall shoulder strength and stability.
- Variation: The alternating incline bench press provides a variation to the traditional bench press, helping to keep your workout routine fresh and challenging.
How to Perform Alternating Incline Bench Press

To perform the alternating incline bench press, follow these steps:
- Set up an incline bench at a 45-degree angle.
- Grab a pair of dumbbells that are heavy enough to challenge you but not too heavy that you can't complete the exercise with proper form.
- Sit on the incline bench with your feet flat on the floor.
- Lean back on the bench and lift the dumbbells to the starting position, with your arms fully extended and the dumbbells directly above your chest.
- Lower one dumbbell to your chest while keeping the other arm extended.
- Push the dumbbell back up to the starting position and lower the other dumbbell to your chest.
- Continue alternating between each arm for the desired number of reps.
It's important to maintain proper form throughout the exercise. Keep your elbows close to your body and your wrists straight. Breathe in as you lower the dumbbell and exhale as you push it back up.
Tips for Performing Alternating Incline Bench Press

Here are some tips to help you perform the alternating incline bench press with proper form:
- Warm up properly before starting the exercise.
- Use a weight that challenges you but allows you to complete the exercise with proper form.
- Keep your shoulders down and back throughout the exercise.
- Focus on controlling the weight as you lower it to your chest.
- Keep your core engaged throughout the exercise.
- Don't arch your back or lift your hips off the bench.
Variations of Alternating Incline Bench Press
There are several variations of the alternating incline bench press, including:
- Single-Arm Alternating Incline Bench Press: This variation involves lifting one dumbbell at a time while lying on an incline bench.
- Close-Grip Alternating Incline Bench Press: This variation involves holding the dumbbells with a close grip, targeting the triceps more.
- Reverse-Grip Alternating Incline Bench Press: This variation involves holding the dumbbells with a reverse grip, targeting the upper chest more.
Conclusion
The alternating incline bench press is a challenging exercise that targets the chest, shoulders, and triceps. It's a great way to build upper body strength and improve muscle imbalance. By following proper form and incorporating variations, you can get the most out of this exercise and take your workout routine to the next level.
Related video of Alternating Incline Bench Press: The Ultimate Guide to Building Upper Body Strength
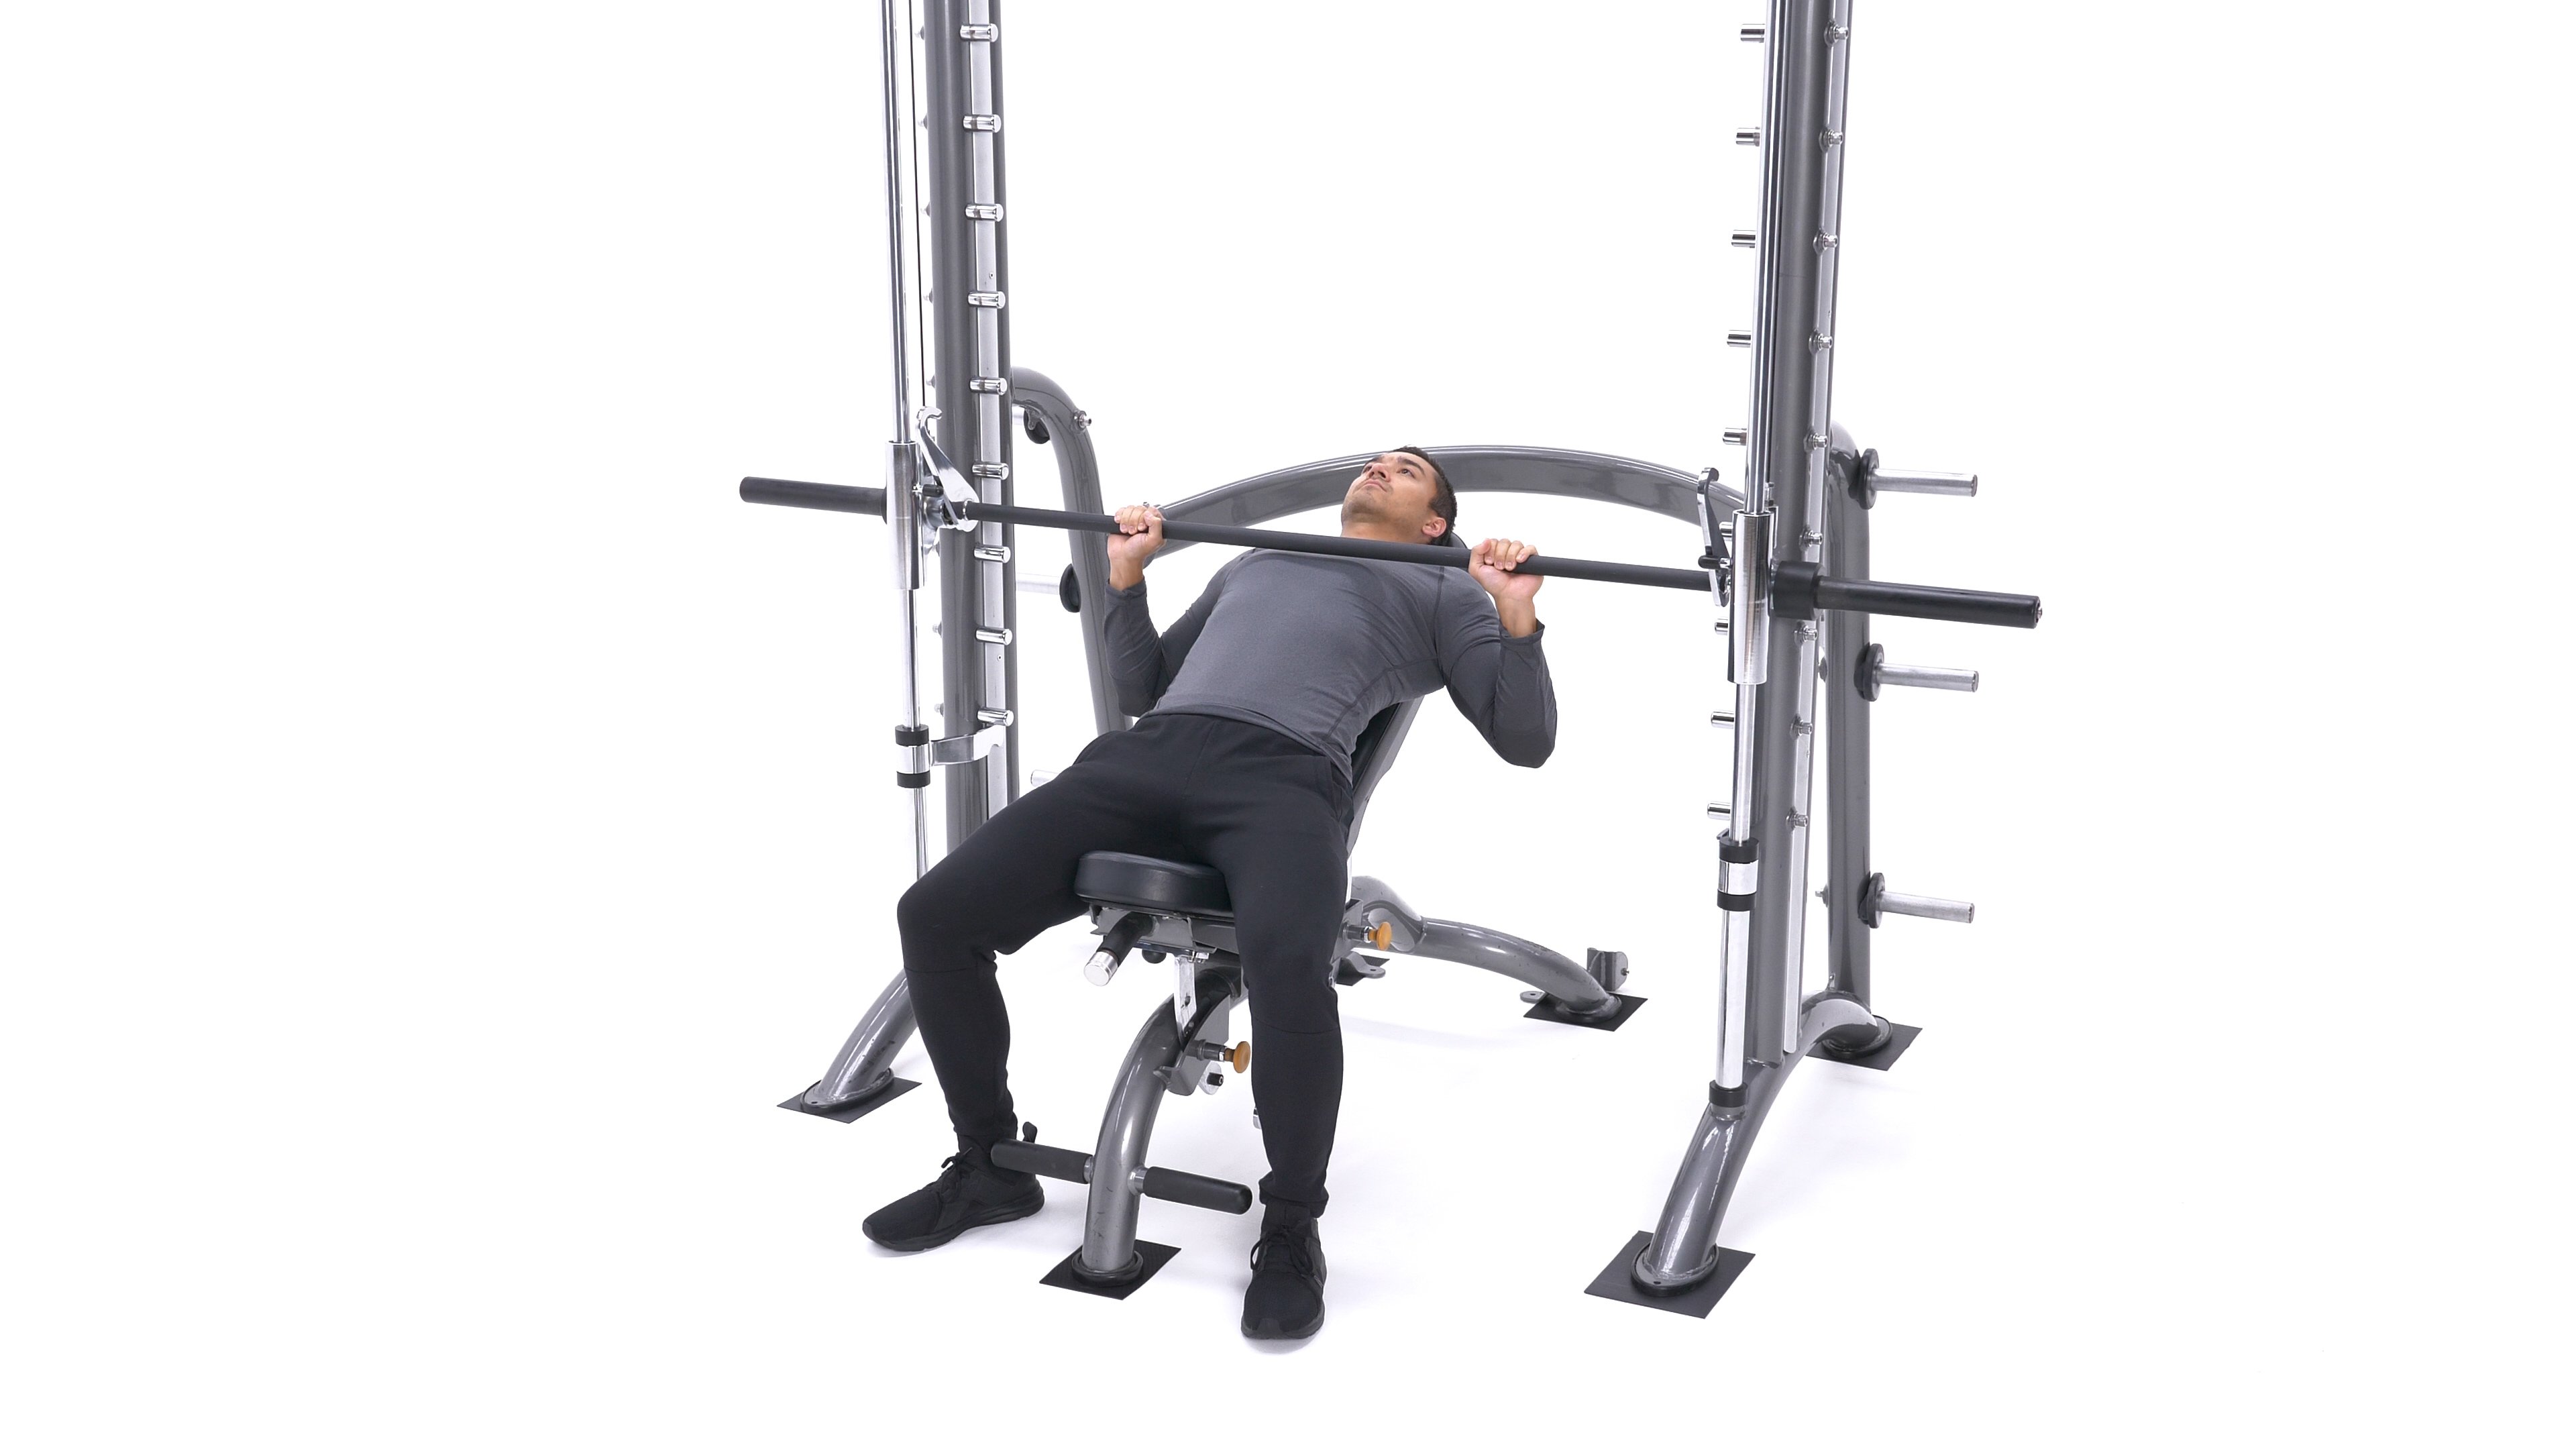
The incline Smith machine press is a popular exercise among bodybuilders and fitness enthusiasts. It is a variation of the traditional Smith machine press that targets the upper chest, shoulders, and triceps. In this article, we will discuss the benefits, technique, and variations of the incline Smith machine press.
Benefits of Incline Smith Machine Press

The incline Smith machine press is an effective exercise for building upper chest and shoulder muscles. It also engages the triceps and core muscles for stability during the movement. This exercise is particularly beneficial for bodybuilders and athletes who require upper body strength and power.
In addition, the incline Smith machine press is a safer alternative to the traditional barbell press. The Smith machine provides a guided path for the barbell, reducing the risk of injury and allowing for a more controlled movement. This makes the incline Smith machine press a suitable exercise for beginners and individuals with limited mobility.
Technique of Incline Smith Machine Press

The incline Smith machine press is performed on an incline bench with the Smith machine. Follow these steps to perform the exercise:
- Position the bench at a 30-45 degree incline.
- Adjust the height of the Smith machine bar to chest level.
- Lie on the bench with your feet firmly on the ground and your back flat against the bench.
- Grip the bar slightly wider than shoulder-width apart.
- Unrack the bar and lower it to your chest with control.
- Press the bar back up to the starting position.
Repeat for the desired number of reps and sets.
Variations of Incline Smith Machine Press
There are several variations of the incline Smith machine press that can target different areas of the chest and shoulders. Some of the variations include:
- Close-grip incline Smith machine press
- Wide-grip incline Smith machine press
- Single-arm incline Smith machine press
- Reverse-grip incline Smith machine press
These variations can be incorporated into your workout routine to add variety and challenge to your training.
Tips for Incline Smith Machine Press

Here are some tips to keep in mind when performing the incline Smith machine press:
- Keep your elbows tucked in and close to your body during the movement.
- Avoid locking out your elbows at the top of the movement to maintain tension on your muscles.
- Breathe in as you lower the bar and exhale as you press the bar up.
- Use a weight that challenges you but allows you to maintain proper form.
- Warm up before performing the exercise to reduce the risk of injury.
Conclusion
The incline Smith machine press is an effective exercise for building upper chest and shoulder muscles. It is a safer alternative to the traditional barbell press and can be modified to target different areas of the chest and shoulders. Incorporate the incline Smith machine press into your workout routine to improve your upper body strength and power.
Related video of Incline Smith Machine Press
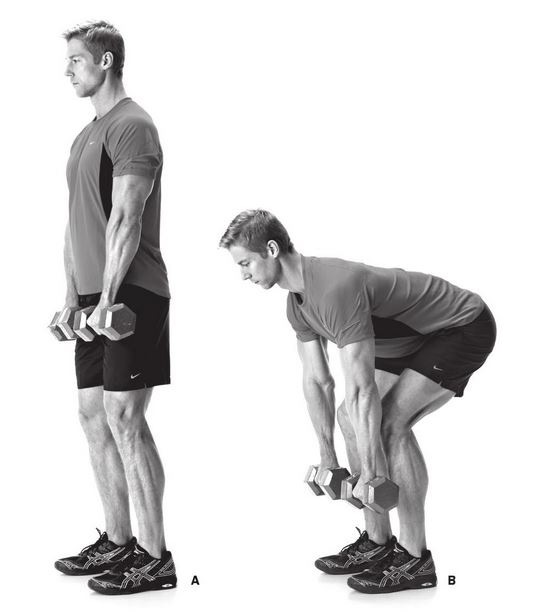
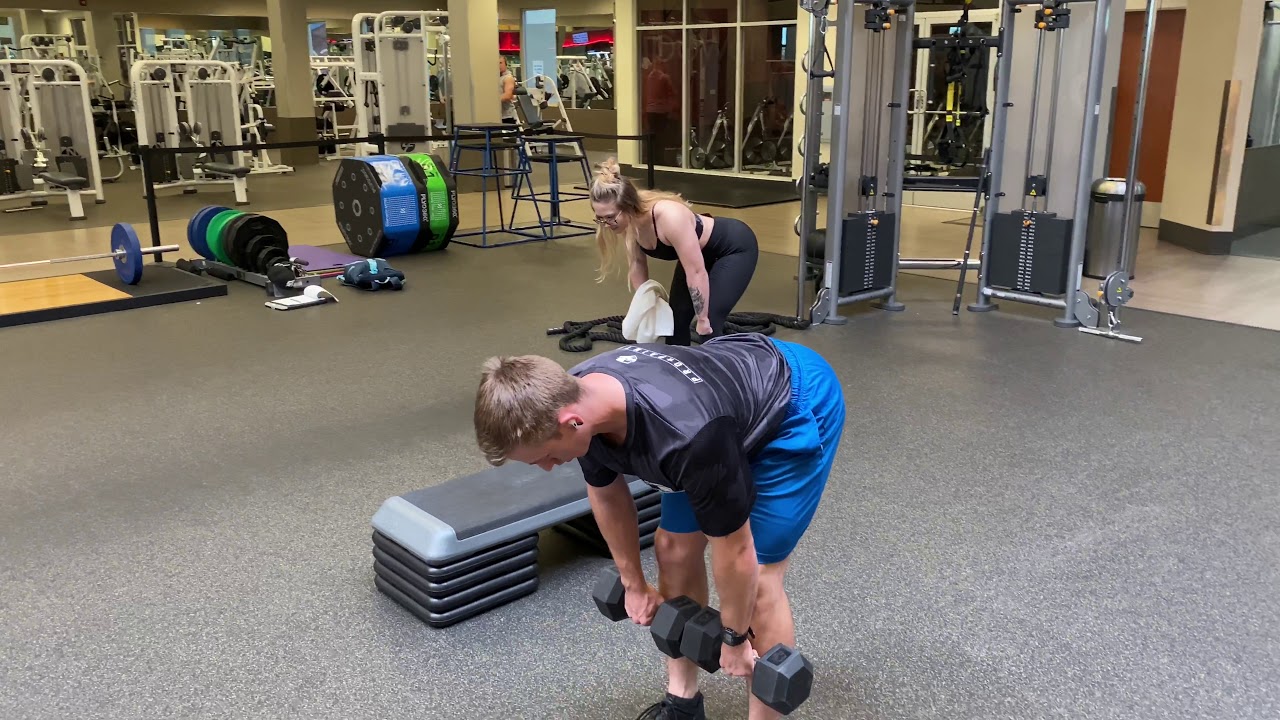
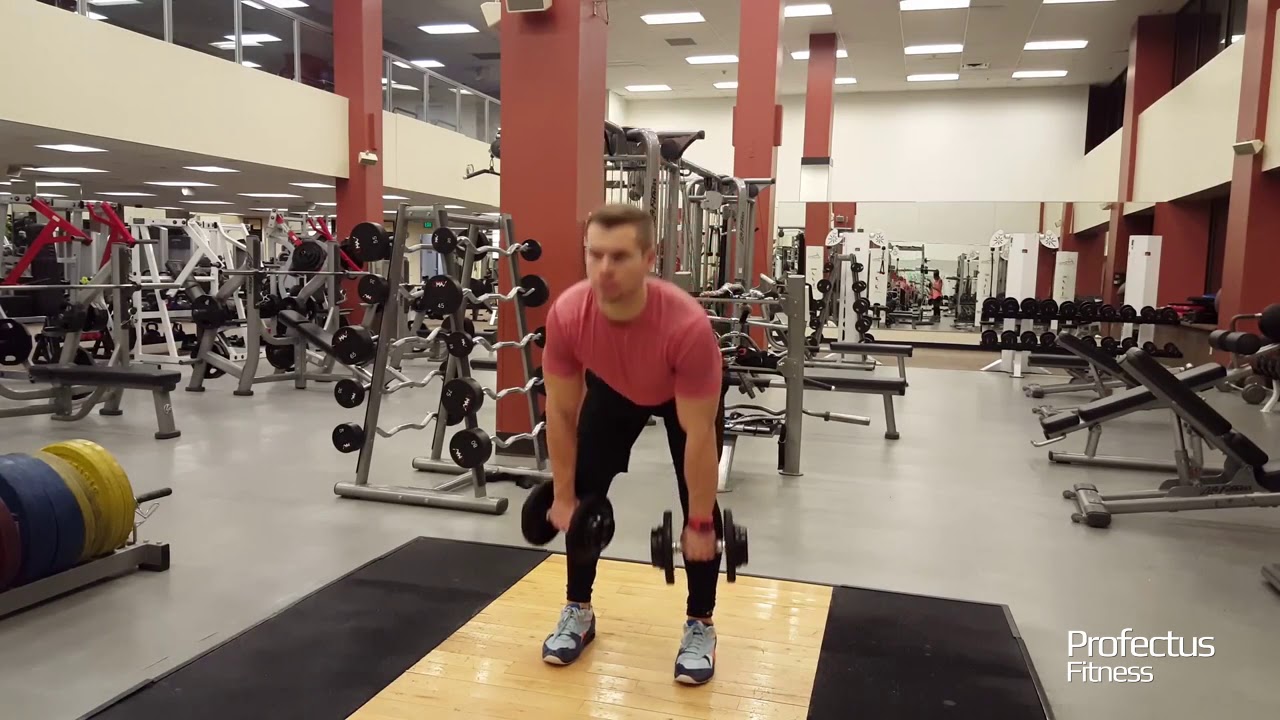
Are you looking for an effective exercise to strengthen your lower body muscles? Look no further than the straight leg deadlift with dumbbells! This compound exercise targets your hamstrings, glutes, lower back, and core muscles, helping you build strength, stability, and endurance.
How to Do Straight Leg Deadlift With Dumbbells

To perform the straight leg deadlift with dumbbells, follow these steps:
- Stand with your feet shoulder-width apart and hold a pair of dumbbells in front of your thighs, palms facing your body.
- Brace your core muscles and keep your spine neutral as you hinge forward at your hips.
- Lower the dumbbells towards the floor while keeping your legs straight and your back flat.
- Stop when you feel a stretch in your hamstrings and glutes, or when you cannot maintain proper form.
- Engage your hamstrings and glutes to lift the dumbbells back up to the starting position.
- Repeat for the desired number of repetitions.
Tips for Straight Leg Deadlift With Dumbbells
Here are some tips to help you perform the straight leg deadlift with dumbbells safely and effectively:
- Start with a light weight and focus on proper form before increasing the load.
- Avoid rounding your back or tucking your chin during the movement.
- Keep your core muscles engaged and your shoulders pulled back throughout the exercise.
- Breathe in as you lower the dumbbells and breathe out as you lift them back up.
- Do not lock your knees at the top of the movement, and avoid hyperextending your lower back.
Variations of Straight Leg Deadlift With Dumbbells

If you want to add more challenge or variety to your workout, you can try these variations of the straight leg deadlift with dumbbells:
- Single-leg straight leg deadlift: Perform the exercise with one leg at a time, keeping the other leg lifted behind you.
- Sumo straight leg deadlift: Stand with your feet wider than shoulder-width apart and your toes turned out, then perform the exercise as usual.
- Romanian deadlift: Bend your knees slightly and allow a slight bend in your elbows as you lower the dumbbells towards the floor.
Benefits of Straight Leg Deadlift With Dumbbells
The straight leg deadlift with dumbbells offers many benefits for your body and fitness goals:
- Strengthens your hamstrings, glutes, lower back, and core muscles.
- Improves your posture, balance, and coordination.
- Increases your overall muscle mass and metabolism, helping you burn more calories at rest.
- Enhances your athletic performance in other exercises or sports.
- Reduces your risk of injury or pain in your lower body and back.
Conclusion
The straight leg deadlift with dumbbells is a versatile and effective exercise that can help you achieve your fitness goals. By following the proper form, tips, and variations, you can challenge your muscles, improve your strength and stability, and prevent injuries. Whether you are a beginner or an advanced lifter, this exercise can be adapted to your level and preferences. Give it a try and feel the burn!
Related video of Straight Leg Deadlift With Dumbbells: A Complete Guide
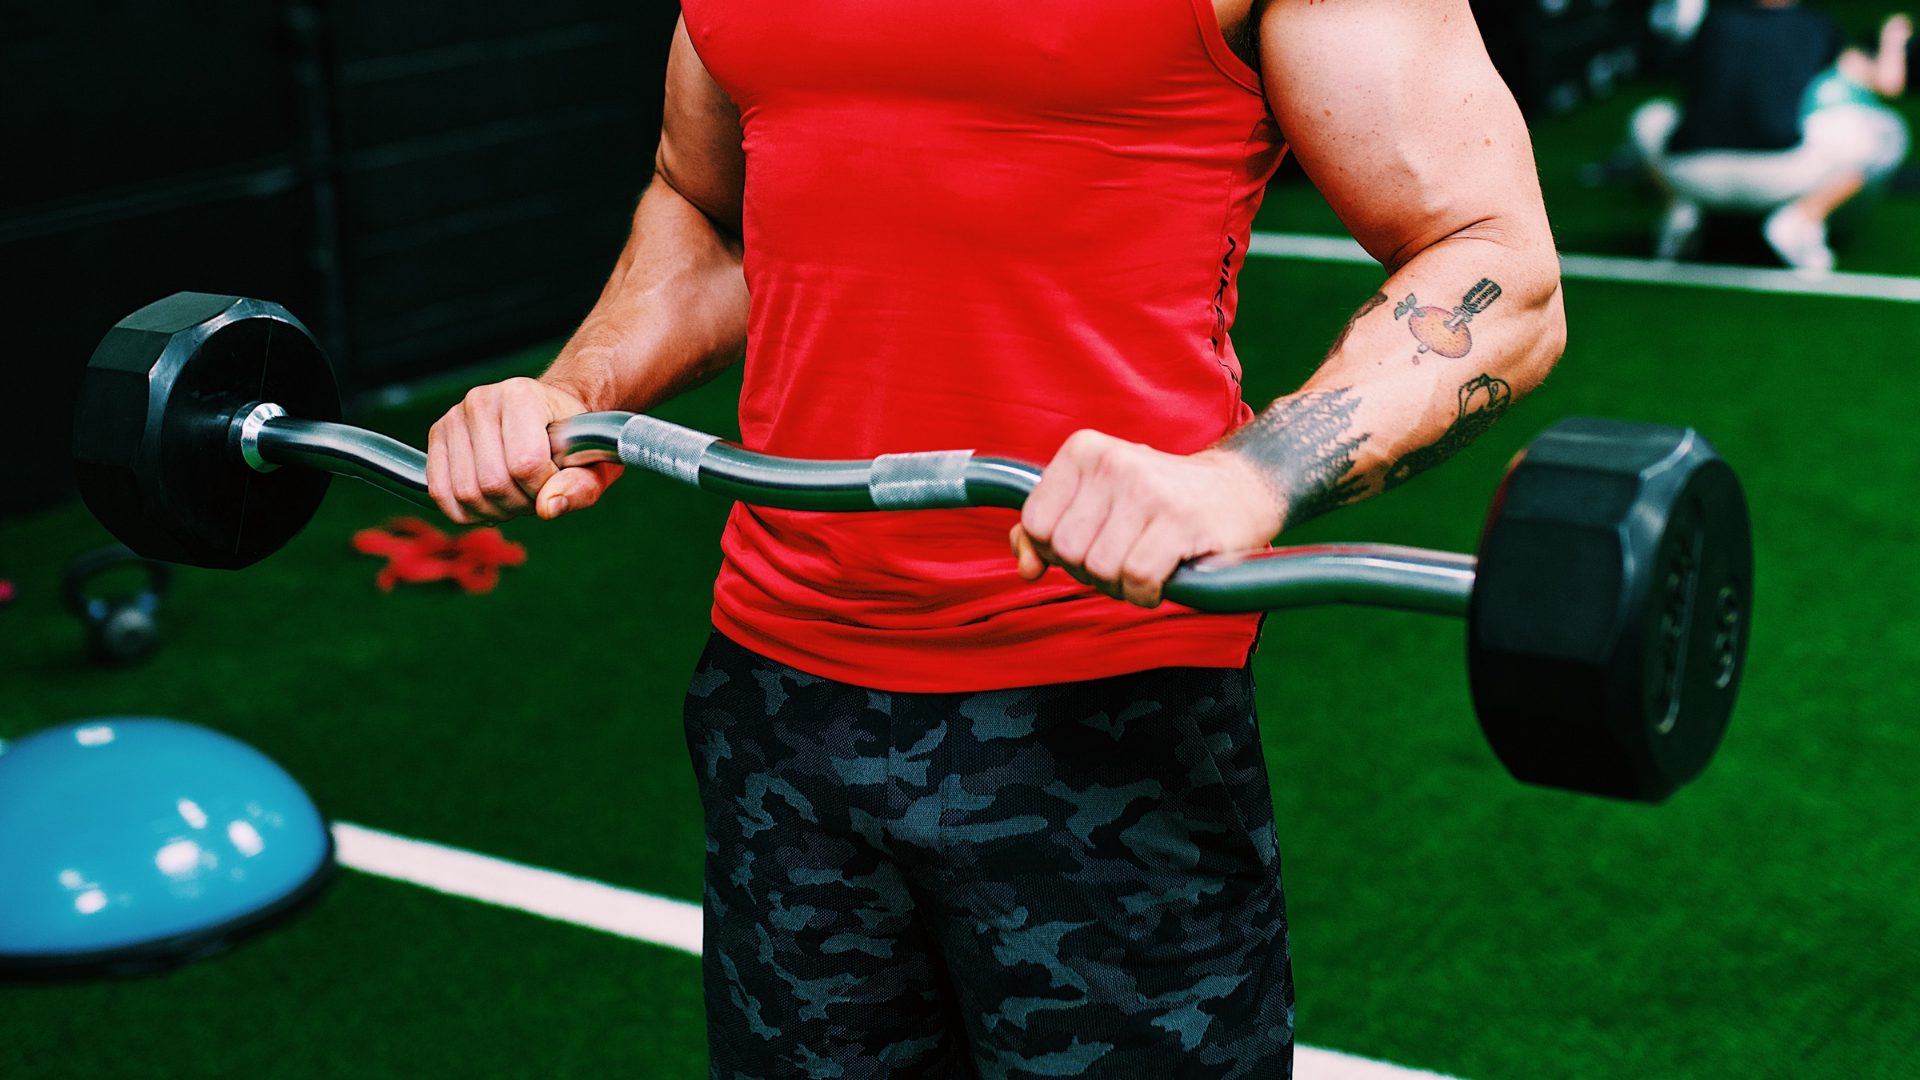
Triceps are the muscles on the back of your arms that help in extending your elbow joint. Tricep workouts are essential for building strong and toned arms. One of the best tricep exercises is the tricep workout with curl bar. This exercise is perfect for anyone who wants to tone and strengthen their triceps. In this article, we will discuss everything you need to know about tricep workout with curl bar.
What is a Curl Bar?
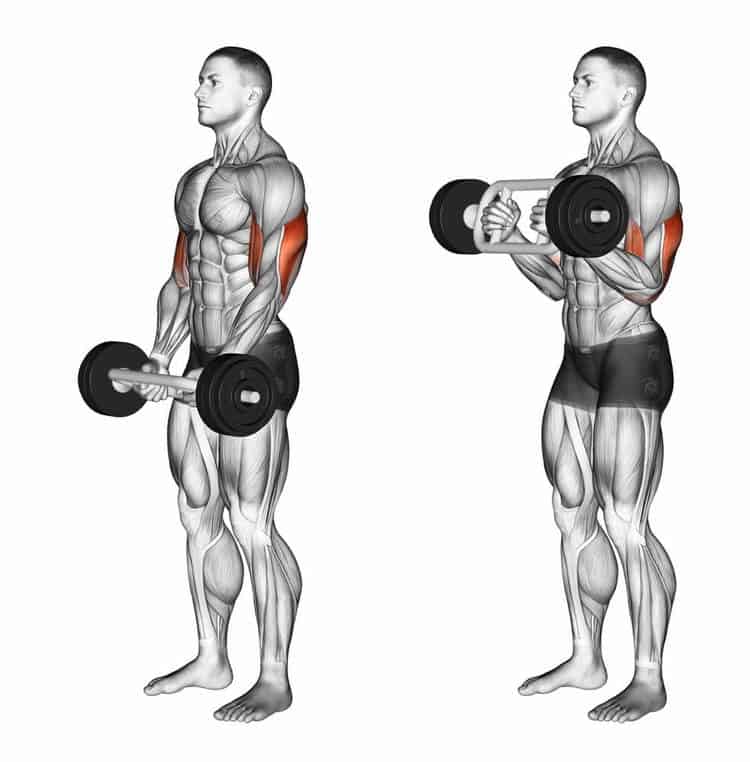
A curl bar is a type of barbell that has a curved shape. The barbell is designed in such a way that it allows you to grip the bar with your palms facing each other, which makes it easier to perform exercises that target your biceps, triceps, and forearms. A curl bar is also known as an EZ bar, and it comes in different sizes and weights.
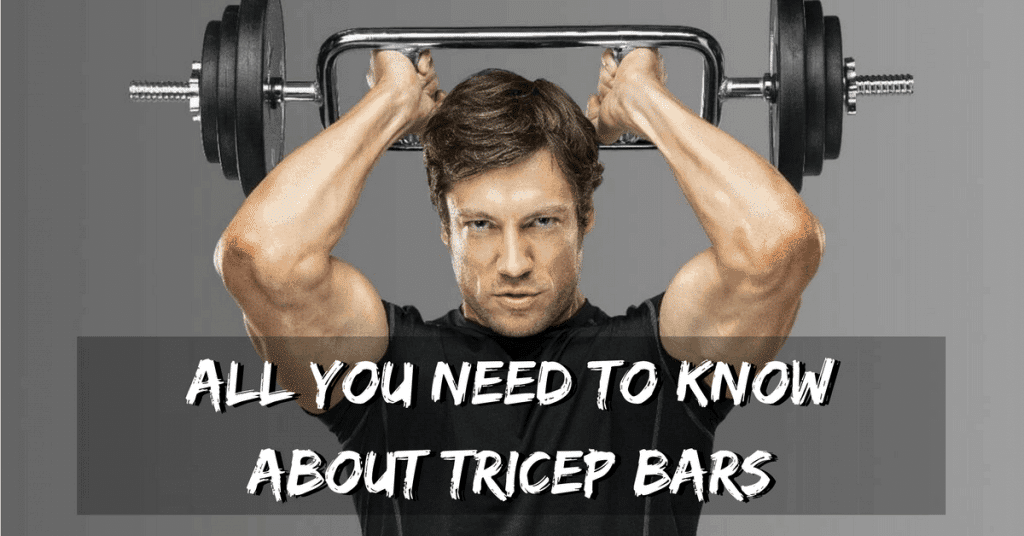
How to Perform Tricep Workout With Curl Bar?
To perform tricep workout with curl bar, follow the steps below:
- First, load the curl bar with weights that you can lift comfortably.
- Hold the curl bar with an overhand grip, with your hands shoulder-width apart.
- Stand with your feet shoulder-width apart, and keep your back straight.
- With your elbows close to your body, slowly lower the curl bar behind your head until it touches your upper back.
- Hold the position for a few seconds, and then lift the curl bar back up to the starting position.
- Repeat the exercise for 10-12 reps, and then rest for 30-60 seconds.
- Complete 3-4 sets of the exercise.
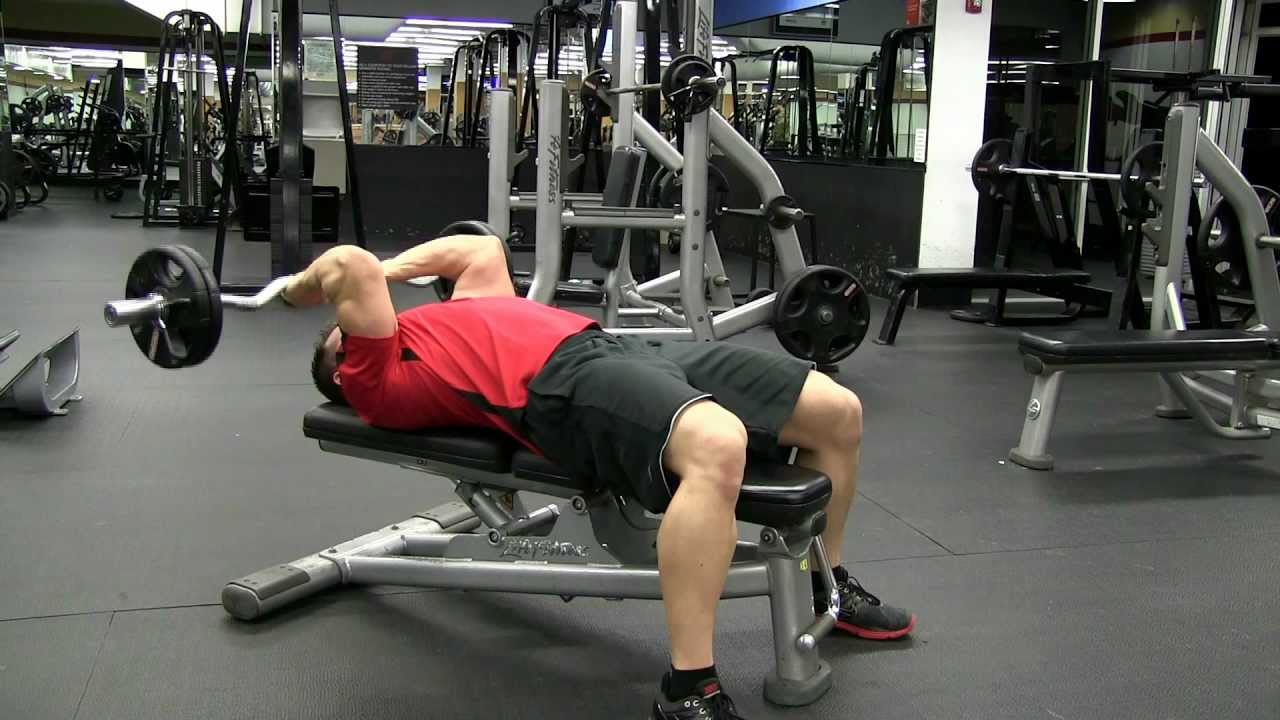
Variations of Tricep Workout With Curl Bar
There are different variations of tricep workout with curl bar that you can try. These variations target different areas of your triceps, and can help you achieve better results. Some of the variations include:
- Close-grip bench press
- Tricep dips
- Overhead tricep extension
- Skull crushers
- Single-arm tricep extension
Tips for Tricep Workout With Curl Bar

To get the most out of your tricep workout with curl bar, follow these tips:
- Warm up properly before starting the exercise.
- Use a weight that you can lift comfortably.
- Keep your elbows close to your body during the exercise.
- Breathe in as you lower the curl bar, and breathe out as you lift it back up.
- Rest for 30-60 seconds between sets.
- Stretch your triceps after the exercise to prevent soreness.
Conclusion
Tricep workout with curl bar is an effective exercise for building strong and toned triceps. By following the tips and variations mentioned in this article, you can achieve better results and prevent injury. Remember to start with a weight that you can lift comfortably, and gradually increase the weight as you get stronger. With consistency and dedication, you can achieve your fitness goals and have strong, toned arms.
Related video of Tricep Workout With Curl Bar

If you're looking for a way to improve your shoulder mobility, the external shoulder rotation exercise is an excellent choice. This exercise targets the muscles that control external rotation of the shoulder, which is essential for many daily activities such as reaching overhead, throwing a ball, or carrying heavy items. In this article, we'll discuss the benefits of the external shoulder rotation exercise and how to perform it correctly.
Benefits of External Shoulder Rotation Exercise

The external shoulder rotation exercise can help you in the following ways:
- Improve shoulder mobility and flexibility
- Strengthen the rotator cuff muscles
- Reduce the risk of shoulder injuries
- Improve posture and reduce shoulder pain
How to Perform External Shoulder Rotation Exercise

Here's how to perform the external shoulder rotation exercise:
- Stand with your feet shoulder-width apart and hold a light weight or resistance band in your right hand.
- Bring your right elbow to your side and bend it to a 90-degree angle.
- Your forearm should be parallel to the floor, and your hand should be pointing forward.
- Slowly rotate your arm outward, keeping your elbow at your side.
- Stop when your forearm is perpendicular to the floor.
- Hold for a few seconds, then slowly return to the starting position.
- Repeat for 10-15 repetitions, then switch sides.
Remember to keep your shoulder blades down and back throughout the exercise, and don't let your shoulder move forward or upward. Also, make sure to use a light weight or resistance band to avoid straining your shoulder muscles.
Variations of External Shoulder Rotation Exercise

There are several variations of the external shoulder rotation exercise that you can try, such as:
- Seated external rotation: Sit on a chair or bench with your back straight and your arms at your sides. Hold a light weight or resistance band in your right hand and perform the external rotation exercise as described above.
- Standing external rotation with a resistance band: Stand with your feet shoulder-width apart and attach a resistance band to a sturdy object behind you. Hold the other end of the band in your right hand and perform the external rotation exercise as described above.
- Side-lying external rotation: Lie on your left side with your left arm under your head as a pillow. Hold a light weight or resistance band in your right hand and perform the external rotation exercise as described above.
These variations can help you target different parts of your shoulder and keep your workout routine interesting.
Conclusion
The external shoulder rotation exercise is a simple yet effective way to improve your shoulder mobility and reduce the risk of injuries. By performing this exercise regularly and correctly, you can strengthen your rotator cuff muscles and improve your overall posture. Remember to start with a light weight or resistance band and gradually increase the intensity as you get stronger. Consult with a healthcare professional before starting any new exercise routine.
Related video of External Shoulder Rotation Exercise: Improve Your Shoulder Mobility

Are you tired of having tight and sore chest muscles? Do you want to improve your posture and breathing? If so, then it's time to try the foam roller chest stretch. This simple exercise can help you loosen up your chest muscles and improve your range of motion. In this article, we'll discuss the benefits of foam roller chest stretch and how to do it properly.
Benefits of Foam Roller Chest Stretch

The foam roller chest stretch has several benefits for your body, including:
- Loosens up tight chest muscles
- Improves posture
- Increases flexibility
- Improves breathing
- Reduces risk of injury
- Relieves tension in the upper body
By incorporating the foam roller chest stretch into your routine, you can improve your overall physical health and wellbeing.
How to Do Foam Roller Chest Stretch

Follow these steps to perform the foam roller chest stretch:
- Lie down on your back with knees bent and feet on the floor.
- Place the foam roller under your upper back and bring your arms out to the sides.
- Slowly roll the foam roller up and down your upper back, stopping when you reach your chest.
- Hold the position for 30 seconds, then release.
- Repeat for 3-4 sets.
When performing the foam roller chest stretch, make sure to keep your core engaged and breathe deeply. If you feel any pain or discomfort, stop the exercise immediately.
Tips for Foam Roller Chest Stretch

Here are some tips to help you get the most out of your foam roller chest stretch:
- Use a high-density foam roller for maximum support.
- Roll slowly and gradually.
- Avoid rolling over your neck or lower back.
- Don't hold your breath – breathe deeply throughout the exercise.
- Add the foam roller chest stretch to your warm-up or cool-down routine.
By following these tips, you can ensure that you're performing the foam roller chest stretch correctly and safely.
Conclusion
The foam roller chest stretch is a simple yet effective exercise that can help you improve your chest muscles' flexibility, posture, and breathing. By incorporating this stretch into your routine, you can reduce your risk of injury and relieve tension in your upper body. Remember to perform the foam roller chest stretch slowly and gradually, and always listen to your body.
Related video ofFoam Roller Chest Stretch: Benefits and How to Do It

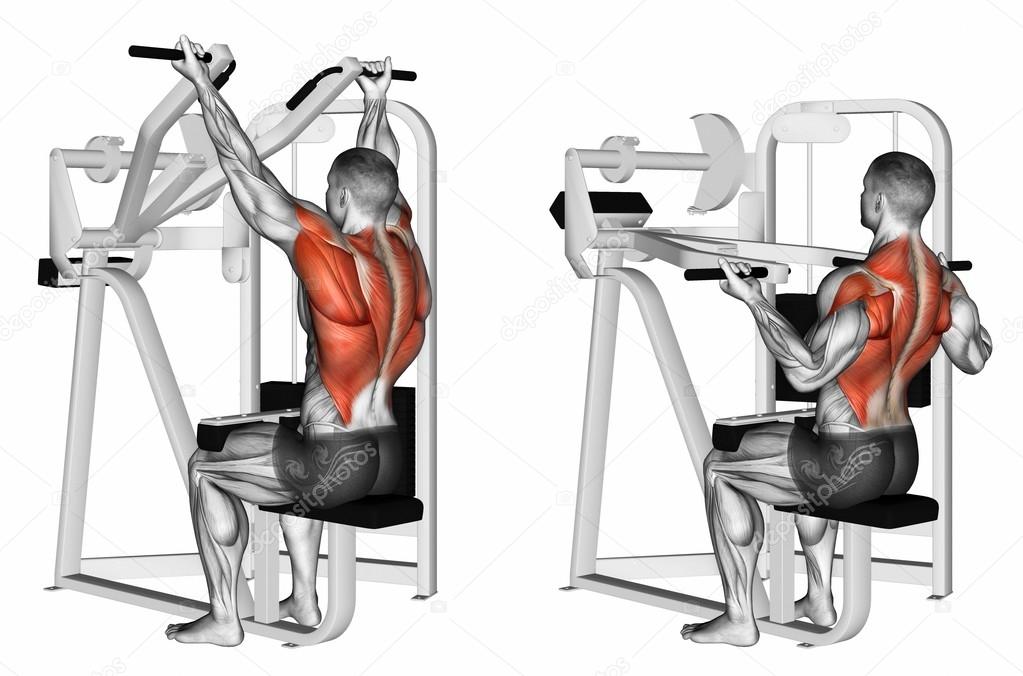
The reverse lateral pull down is a strength training exercise that targets the upper back muscles, particularly the latissimus dorsi or lats. This exercise is also known as the reverse grip lat pulldown, reverse grip cable pulldown, or chin-up pulldown.
How to Perform the Reverse Lateral Pull Down
To perform the reverse lateral pull down, you will need a cable machine with a lat pulldown bar. Follow these steps:
- Adjust the weight on the cable machine and attach the lat pulldown bar.
- Sit on the machine with your feet flat on the ground and your knees bent at a 90-degree angle.
- Grasp the lat pulldown bar with an underhand grip, with your hands shoulder-width apart.
- Keeping your back straight and your chest up, pull the bar down towards your chest.
- Pause for a second at the bottom of the movement, then slowly release the bar back to the starting position.
- Repeat for the desired number of repetitions.
Variations of the Reverse Lateral Pull Down
There are several variations of the reverse lateral pull down that you can try to target different areas of your back:
Close Grip Reverse Lateral Pull Down
This variation involves using a closer grip on the lat pulldown bar, with your hands only a few inches apart. This places more emphasis on the lower lats and can help to create a V-shaped back.

Wide Grip Reverse Lateral Pull Down
The wide grip reverse lateral pull down involves using a wider grip on the lat pulldown bar, with your hands placed wider than shoulder-width apart. This targets the upper lats and can help to create a wider back.

One Arm Reverse Lateral Pull Down
This variation involves performing the exercise with one arm at a time, using a D-handle attachment on the cable machine. This helps to isolate each lat muscle and can help to correct muscle imbalances.

Benefits of the Reverse Lateral Pull Down
The reverse lateral pull down is a highly effective exercise for building a strong, muscular back. Here are some of the main benefits:
- Targets the latissimus dorsi, which is the largest muscle in the back.
- Improves posture and spinal stability.
- Strengthens the grip and forearm muscles.
- Can help to prevent lower back pain.
- Increases pulling strength, which can transfer to other exercises like chin-ups and rows.
Precautions and Tips
When performing the reverse lateral pull down, it is important to keep the following precautions and tips in mind:
- Choose an appropriate weight that allows you to maintain proper form.
- Avoid using momentum to lift the weight, as this can put unnecessary stress on the lower back.
- Keep your elbows close to your sides and your shoulders down and back throughout the movement.
- Breathe out as you pull the bar down and breathe in as you release it.
- If you have any shoulder or back injuries, consult with a healthcare professional before attempting this exercise.
Conclusion
The reverse lateral pull down is a highly effective exercise for building a strong, muscular back. By following the proper form and variations, you can target different areas of your back and achieve your desired results. Remember to always listen to your body and consult with a healthcare professional if you have any concerns or injuries.
Related video of Reverse Lateral Pull Down: A Comprehensive Guide
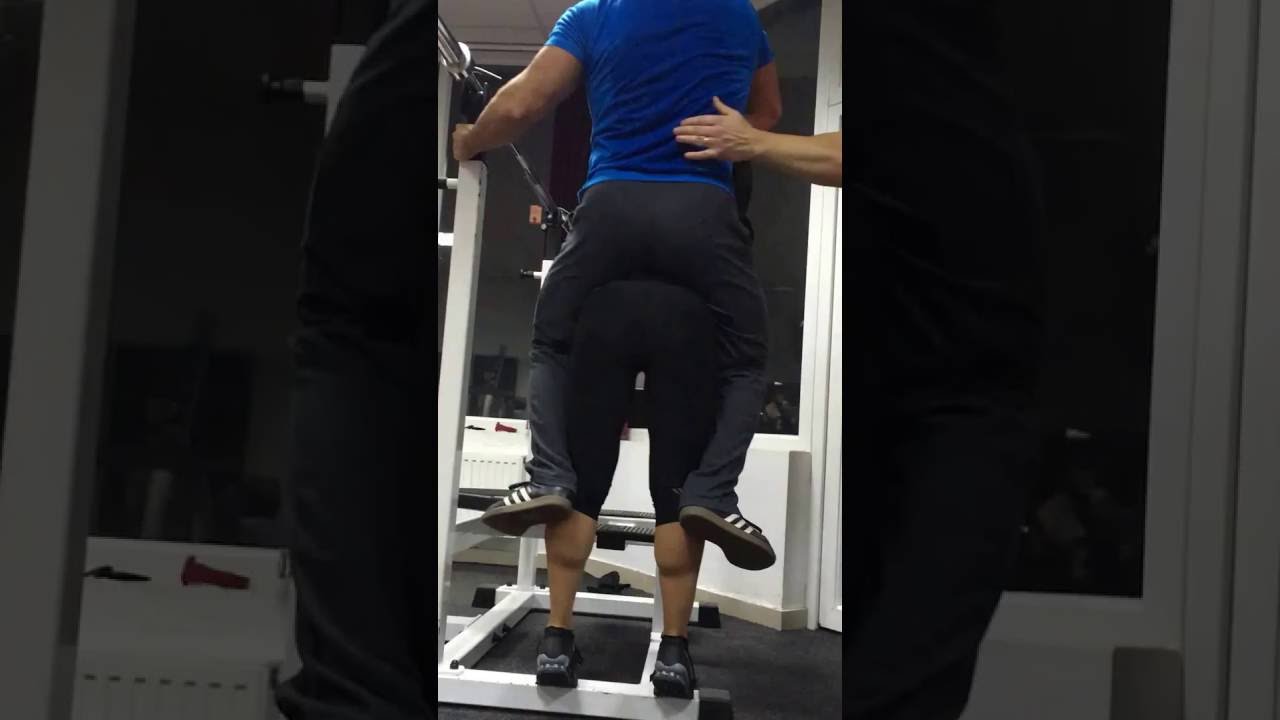
The calf raise is a popular exercise used to strengthen the muscles in the lower leg. It involves standing on the balls of your feet and raising your heels as high as you can, then lowering them back down to the ground. While the exercise may seem simple, it can be incredibly effective when done correctly, and as proven by the world record for calf raises.
What is the World Record for Calf Raises?

The current world record for calf raises was set by Sahil Sharma, a fitness enthusiast from India. On January 30, 2020, Sharma completed 17,000 calf raises in just 5 hours and 28 minutes, breaking the previous record of 14,000 calf raises set by Australian athlete Kunal Sharma in 2015.
Sharma's incredible feat required a great deal of physical endurance and mental strength. He had to maintain a consistent pace of calf raises for over 5 hours, which required him to find a rhythm and stick to it. He also had to stay mentally focused and motivated throughout the entire process, pushing through the pain and discomfort that inevitably comes with such a grueling exercise.
Why Did Sahil Sharma Attempt the World Record?

Sharma's primary motivation for attempting the world record was to raise awareness about the importance of fitness and exercise. He wanted to show people that with dedication and hard work, anyone can achieve their fitness goals, no matter how lofty they may seem.
Sharma also wanted to set an example for his fellow Indians, many of whom struggle with obesity and other health issues. By breaking the world record for calf raises, Sharma hoped to inspire others to take charge of their health and begin living a more active lifestyle.
How Can You Improve Your Calf Raises?

While you may not be able to break the world record for calf raises, you can certainly improve your own performance and reap the benefits of stronger, more toned calves. Here are some tips to help you get the most out of your calf raises:
- Focus on form - make sure your feet are parallel and your weight is evenly distributed
- Use a full range of motion - raise your heels as high as you can and lower them all the way back down
- Take it slow - don't rush through the exercise, focus on controlled movements
- Incorporate weights - add resistance to your calf raises by holding dumbbells or using a weight machine
- Vary your routine - mix up your calf raises with other leg exercises to keep your muscles challenged and prevent boredom
By following these tips and sticking to a consistent exercise routine, you can achieve stronger, more toned calves and improve your overall fitness level.
The Importance of Exercise for Overall Health and Wellbeing

The world record for calf raises may seem like a lofty and unattainable goal, but it serves as a reminder of the importance of exercise for overall health and wellbeing. Regular physical activity can help reduce the risk of chronic diseases like heart disease, diabetes, and cancer, as well as improve mental health and cognitive function.
Whether you're a fitness enthusiast like Sahil Sharma or simply looking to improve your health and fitness, incorporating regular exercise into your routine can have a profound impact on your quality of life. So why not lace up your sneakers and start working on your own calf raises today?
Related video of World Record Calf Raise
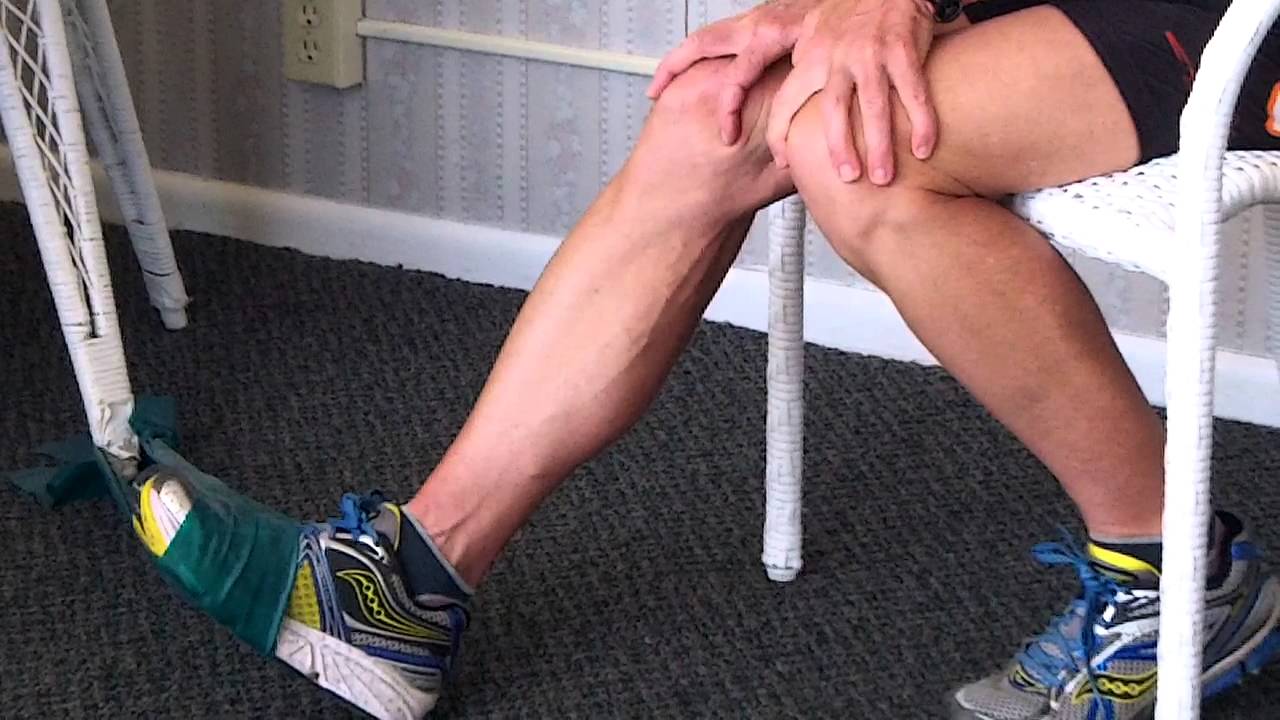
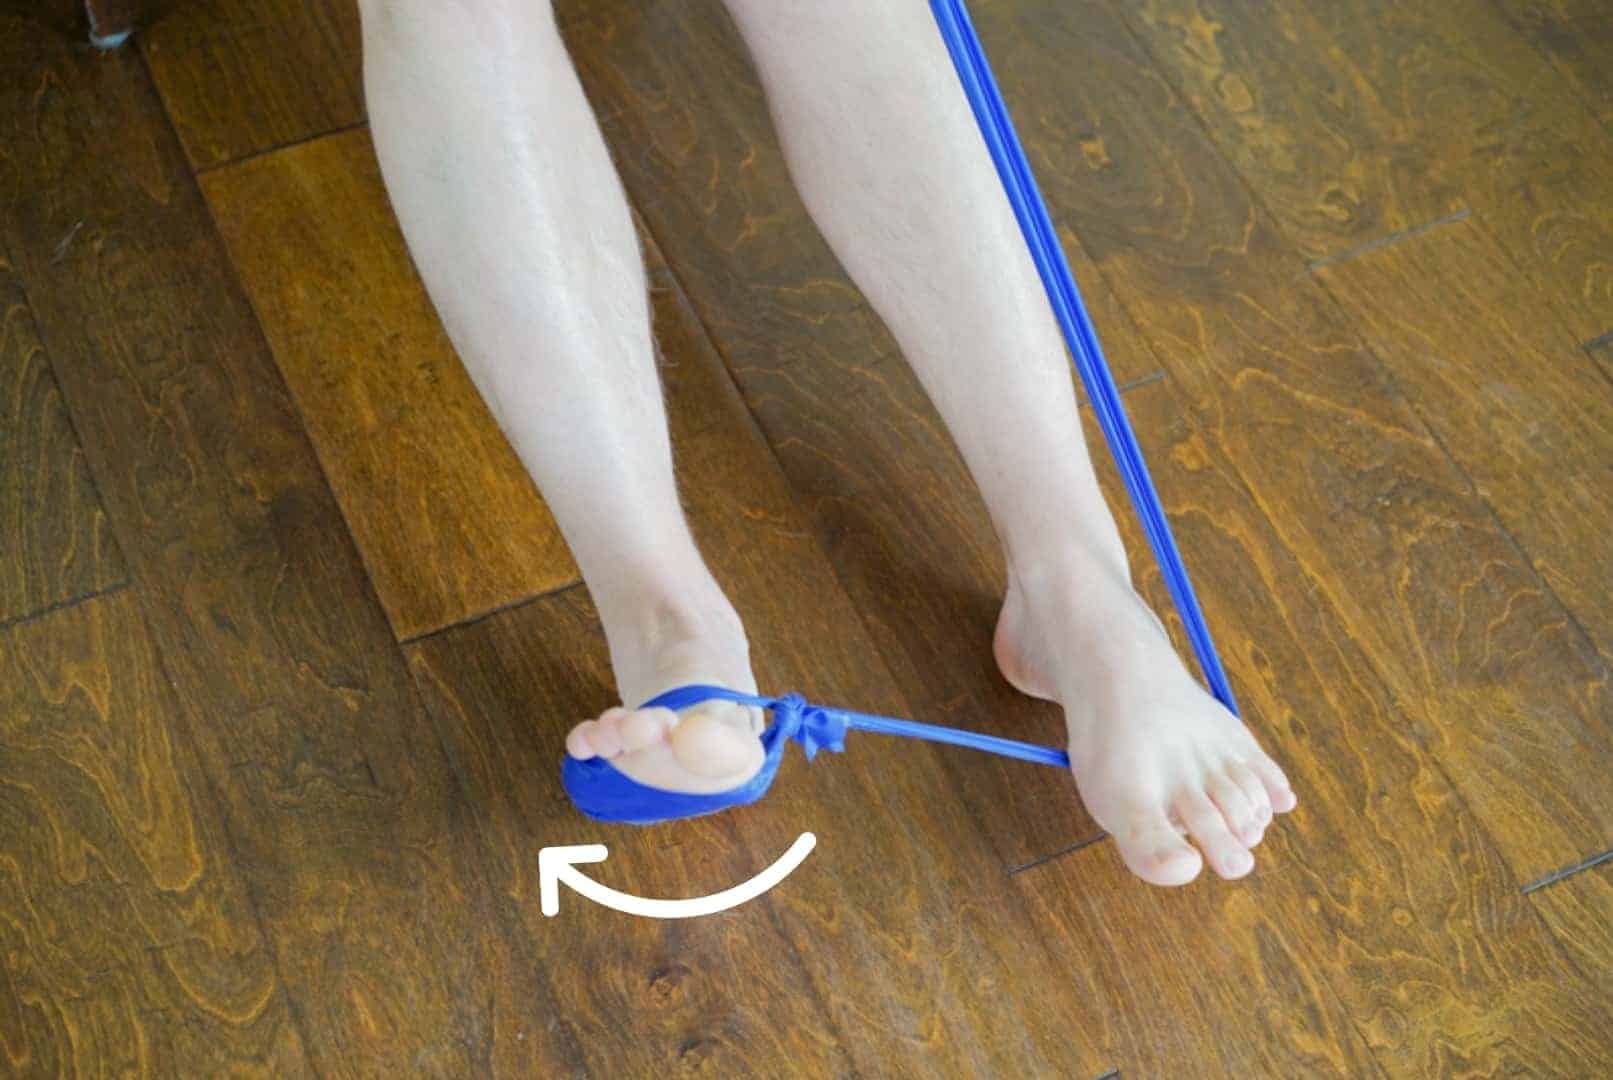
Exercises with ankle bands are a great way to strengthen your lower body and improve your overall fitness. Ankle bands are small, elastic bands that fit around your ankles and provide resistance as you move your legs. They are a versatile piece of equipment that can be used for a variety of exercises, including those that target your glutes, hips, and thighs.
Glute Bridges
Glute bridges are an excellent exercise for strengthening your glutes and hamstrings. To perform this exercise with ankle bands, lie on your back with your knees bent and your feet flat on the ground. Place the ankle bands around your ankles, and lift your hips off the ground while squeezing your glutes. Hold for a few seconds, then lower your hips back down to the ground. Repeat for several reps.

Side Lying Leg Lifts
Side lying leg lifts are a great exercise for targeting your outer thighs. To perform this exercise with ankle bands, lie on your side with your legs extended straight out. Place the ankle bands around your ankles, and lift your top leg as high as you can while keeping it straight. Lower your leg back down to the starting position, and repeat for several reps before switching sides.

Clamshells
Clamshells are another excellent exercise for targeting your outer thighs. To perform this exercise with ankle bands, lie on your side with your knees bent and your feet together. Place the ankle bands around your ankles, and lift your top knee as high as you can while keeping your feet together. Lower your knee back down to the starting position, and repeat for several reps before switching sides.
Fire Hydrants
Fire hydrants are a great exercise for targeting your glutes and hips. To perform this exercise with ankle bands, get down on all fours with your hands and knees on the ground. Place the ankle bands around your ankles, and lift your leg out to the side while keeping your knee bent. Lower your leg back down to the starting position, and repeat for several reps before switching sides.

Ankle Band Squats
Ankle band squats are a great exercise for targeting your quads, hamstrings, and glutes. To perform this exercise with ankle bands, stand with your feet shoulder-width apart and place the ankle bands around your ankles. Squat down as low as you can while keeping your feet flat on the ground and your chest up. Return to the starting position, and repeat for several reps.

Ankle Band Lunges
Ankle band lunges are a great exercise for targeting your quads, hamstrings, and glutes. To perform this exercise with ankle bands, stand with your feet shoulder-width apart and place the ankle bands around your ankles. Step forward with one foot, bending your knee and lowering your body until your back knee is just above the ground. Return to the starting position, and repeat for several reps before switching sides.
Exercises with ankle bands are a great way to add variety to your workout routine and target specific muscle groups. Incorporate these exercises into your next workout for a challenging and effective lower body workout.